
Build Your Own Clap-Activated Switch: A Fun Arduino Project!
Clap to switch an LED on or off! This project uses an Arduino, a sound sensor, and a simple state-toggle to create a smart, sound-activated switch. It’s a great first step into sensor inputs and digital outputs.

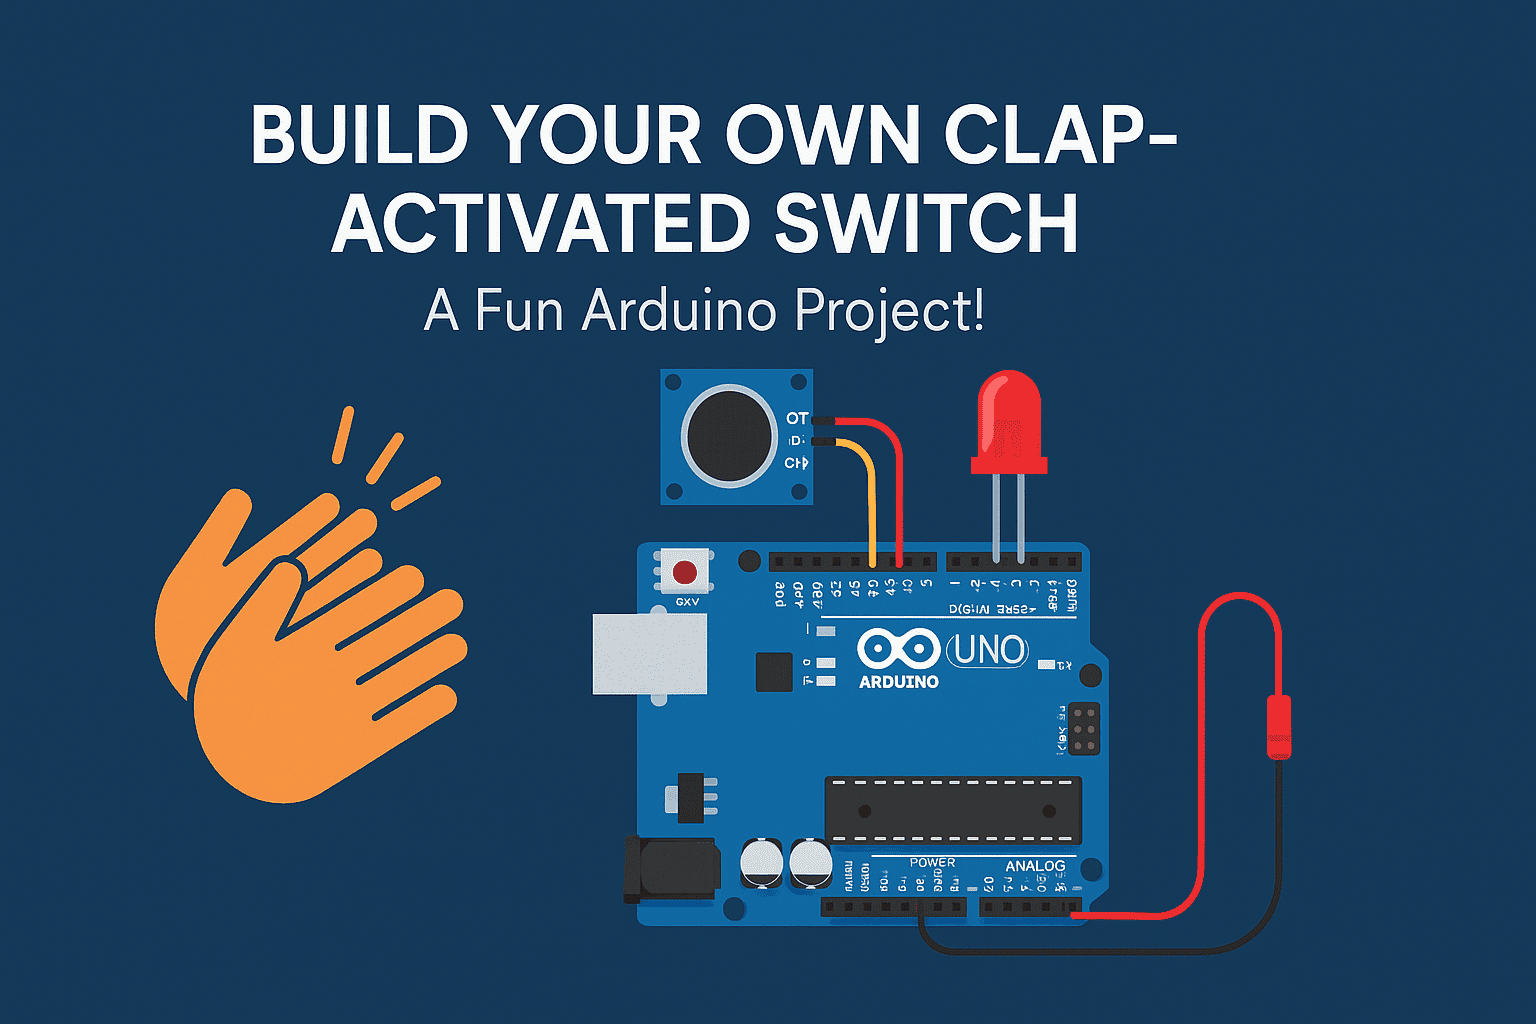
Concept: sound → logic → LED.

Wiring: VCC/GND, D0→D9, LED→D13.
🔧 Components
- Arduino Uno (or compatible)
- Sound Sensor Module with digital output (D0)
- LED + optional 220 Ω resistor
- Breadboard & Jumper Wires
- USB Cable to upload code
⚙️ Connections
- Sensor VCC → 5V, GND → GND
- Sensor D0 → D9 (Arduino)
- LED Anode → D13 (via resistor), Cathode → GND

💻 Arduino Code
int sensorPin = 9;   // Sound sensor pin (D0)
int ledPin = 13;     // LED pin
int clapState = 0;   // To store LED state
int sensorValue = 0; // To read sensor input

void setup() {
  pinMode(sensorPin, INPUT);
  pinMode(ledPin, OUTPUT);
  Serial.begin(9600);
}

void loop() {
  sensorValue = digitalRead(sensorPin);
  Serial.println(sensorValue);

  if (sensorValue == HIGH) {
    clapState = !clapState;       // Toggle LED state
    digitalWrite(ledPin, clapState);
    delay(2000);                  // Simple debounce / cooldown
  }
}
Paste into Arduino IDE → Tools ▸ Board: Arduino Uno → select Port → Upload.
🚀 Test & Simulate
Simulate a clap and see the LED toggle, just like the real build.
FAQ
Can I switch a relay instead of an LED?
Yes—use a relay module on a digital pin and switch AC loads. Follow proper electrical safety and isolation.
The sensor triggers randomly. What helps?
Reduce sensitivity (potentiometer), add a small cooldown (e.g., 1500–2500 ms), shorten jumpers, and avoid noisy power sources.
Why the 2s delay?
It’s a simple debounce/cooldown so multiple pulses from one clap don’t double-toggle the LED.
🎥 Reference video: Clap-Activated Switch Project.